DIY磁悬浮

You can build a diy magnetic levitation device right at home. Magnetic levitation means using magnets to make objects float in the air without touching anything. You might start with simple floating tricks or move up to advanced projects like floating speakers or even magnetic levitation train models. Many people share their builds on YouTube and Instructables, so you’ll find plenty of guides and kits online. Ready to learn the steps, gather materials, and get some tips for success?
Here’s a quick look at popular project types:
Skill Level
Project Type
描述
Beginner
Simple Floating Tricks
Try basic projects to see how magnetic forces work.
Advanced
Floating Speakers
Balance magnets to make audio devices hover in mid-air.
Advanced
Magnetic Levitation Train Models
Build small trains that float and glide using strong magnetic forces.
关键要点
Magnetic levitation allows objects to float using magnets. Start with simple projects to understand the basic principles.
Safety is crucial when working with magnets. Keep them away from children and pets, and wear gloves to protect your fingers.
Gather strong neodymium magnets and a stable base for your project. Use cardboard for beginners, then upgrade to sturdier materials.
Electronics are essential for controlling levitation. Use sensors and coils to maintain balance and stability in your setup.
Experiment with different weights and magnet placements. Adjust your controller settings to achieve smooth and stable levitation.
DIY Magnetic Levitation Basics

Principles
Magnetic levitation might sound like magic, but it’s all about science. When you build a diy magnetic levitation project, you use magnets to make things float in the air. Here’s how it works:
Magnetic levitation lets an object float without touching anything.
Magnets create invisible fields that push or pull on each other.
These magnetic fields can balance out gravity, so objects can hover.
Superconductors can make magnets float above them because of something called the Meissner effect. This effect forces magnetic fields out, which helps with levitation.
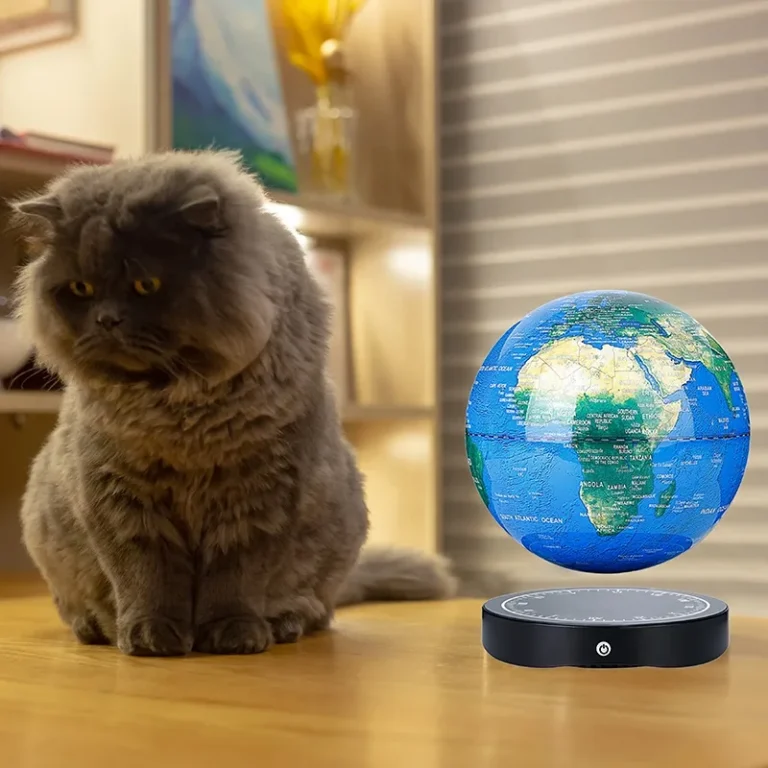
You can try simple experiments, like making a small magnet float above another. If you want a challenge, you can build advanced platforms or displays that hold up bigger objects. Some people even make floating lamps or spinning globes. Scientists have studied diy magnetic levitation for years, and their work helps us understand how to make these projects at home. 例如, researchers have found new ways to make magnets float by spinning them or using special setups. This research has led to cool inventions like maglev trains and floating displays.
If you learn best by watching, check out YouTube or Instructables. These sites have step-by-step videos and guides that show you exactly what to do.
Safety
Working with magnets is fun, but you need to stay safe. Here are some important tips:
Keep magnets away from kids and pets. Swallowing magnets is very dangerous.
Wear gloves when handling strong magnets to avoid pinching or crushing your fingers.
Don’t let magnets near power outlets or electronics. They can cause shocks or damage devices.
Use safety glasses to protect your eyes from splinters if a magnet breaks.
Stay away from magnets if you have a pacemaker or other medical device.
Avoid machining or grinding magnets, as the dust can catch fire.
If you have a nickel allergy, don’t touch magnets for long periods.
By following these tips, you can enjoy your diy magnetic levitation project safely.
Materials and Setup
Before you start building your diy magnetic levitation project, you need to gather the right materials. You will use magnets, a sturdy base, and some electronics. Let’s break down what you need and where you can find these parts.
Magnets
Magnets are the heart of any levitation setup. You want strong magnets that can hold up objects and keep them floating. Here are the most popular types for diy projects:
Neodymium magnets: These are super strong and easy to find online or at hardware stores.
Pyrolytic graphite: This material can float above magnets because it repels magnetic fields.
If you want the best results, look for N52 grade neodymium magnets. N52 magnets are the strongest standard type. They can lift heavier objects and keep their power for a long time. You can use them in high-end devices, maglev trains, and hoverboards. N52 magnets work well up to 80°C (176°F), so they last through many experiments.
Tip: Always check the magnet’s grade before you buy. N52 magnets give you the strongest magnetic field for levitation.
根据
You need a stable base to hold your magnets and electronics. A good base keeps everything steady and helps your project work smoothly. Here are some materials you can use:
Cardboard: It’s easy to cut and shape. You can build a simple platform in minutes.
Hot glue: Use this to stick magnets and parts to your base. Hot glue dries fast and holds tight.
You can also use wood or plastic if you want a stronger base. Just make sure your base is flat and sturdy. If your base wobbles, your levitating object might fall.
Note: Try building your first base with cardboard and hot glue. You can upgrade to stronger materials once you get the hang of it.
Electronics
Electronics help you control and stabilize your levitating object. Magnets alone can’t keep things floating in one spot because of Earnshaw’s theorem. You need sensors and coils to make quick adjustments and keep your object balanced.
Here are the main electronic parts you’ll need:
Hall magnetic sensor (A1302 or A1308): These sensors detect the magnetic field and help you know where your object is.
Comparator (LM311): This chip compares signals from the sensor and tells the coil when to adjust.
Magnetic coil (Modified 5V standard relay, like HW-482 / JQC-3FF-S-Z or JQC3F-05VDC): The coil creates a changing magnetic field to keep your object floating.
You can also use Hall-effect magnetic sensors and electromagnet coils for better control. If you want to make things easier, you can buy a ready-made coil set. 例如, a Premium 5-Piece Magnetic Levitation Coil Set costs about $14.58 and comes with durable copper cores. This set works well for beginners and experienced makers.
Tip: Electronics stores and online shops like Alibaba and Rev1Tech offer complete diy magnetic levitation kits. These kits include magnets, coils, sensors, and instructions. Here’s a quick table to help you compare options:
Product Name | Price | Shipping | Link |
---|---|---|---|
$18 (1-99 pieces) | FREE shipping capped at $20 | ||
Magnetic Levitation DIY Kit | $3,799.00 | N/A |
You can also find guides and videos online that show you how to put everything together. Many makers share their tips on YouTube and Instructables, so you can follow along step by step.
Building Steps

Gather Materials
You need to start by collecting everything for your project. Here’s a checklist to help you get ready:
Strong neodymium magnets (N52 grade works best)
Enameled copper wire for making an electromagnet
Steel bolt (for the coil’s core)
Hall Effect Sensor (A1302 or A1308)
Arduino board (or similar controller)
12v power supply and 9v battery (for testing)
LED and digital voltmeter (to check power and tune the system)
10k resistor
LM311 comparator chip
Magnetic coil (HW-482 or JQC3F-05VDC)
Cardboard, 木头, or plastic for the base
Hot glue, nuts, and washers
Plexiglass sheet (for the top cover)
Oscilloscope (optional, for testing magnetic fields)
Tip: You can find most parts online or at electronics stores. Some shops sell complete kits for diy magnetic levitation projects.
Assemble
Now you’re ready to put everything together. Follow these steps to build your device:
Wrap the copper wire around the steel bolt to create an electromagnet. Connect it to your power supply.
Add an LED and a digital voltmeter to the 12v input. Use a 10k resistor to protect the LED.
Wire the jack to the circuit’s input. Make sure the jack’s case is the ground.
Attach the Hall Effect Sensor to the coil’s center. This sensor will help detect the floating object’s position.
Connect the outputs from the LM311 comparator chip to the solenoid coil.
Secure all components to your base. Make sure the solenoid sits in the right spot and has good airflow.
Place a plexiglass sheet on top. Use nuts and washers to hold it down. The sheet should touch the solenoid.
Test the solenoid’s field with a magnet. Find the correct pole orientation.
Build a frame to hold the electromagnet and sensors at the right distances.
Connect everything to your Arduino. Program the controller to manage the electromagnet and sensors.
Upload your code to the Arduino.
Note: Take your time with wiring. Double-check each connection before you power up the system.
Levitate
You’re ready for the fun part—making something float! Here’s how you can test and achieve levitation:
Power up your device. Watch the LED and voltmeter to make sure everything works.
Place a strong neodymium magnet above the coil.
Use the Hall Effect Sensor to detect the magnet’s position. The Arduino will adjust the coil’s strength.
Try different weights. Add small objects until you find the balance point where the magnet floats.
Adjust the settings on your controller. Fine-tune the system for smooth levitation.
Use an oscilloscope to watch the magnetic fields in action. This helps you see if the system is stable.
Callout: If your magnet doesn’t float, check the coil’s power and the sensor’s position. Sometimes, you need to move things around or change the weight.
Troubleshoot
Sometimes things don’t work right away. Here are common mistakes and ways to fix them:
Too much or too little weight on top can stop levitation. Try adding or removing small weights.
Loose parts cause instability. Make sure everything is tight and secure.
Spinning the top too fast or too slow can make it fall. Find the right speed for your setup.
If your device still wobbles or drops, try these troubleshooting techniques:
Change the controller settings. You can use a PI controller to help stabilize the system.
Try a PD controller with a low-pass filter. This can smooth out quick changes and keep things steady.
Use a PID controller for more control. Adjust the settings until you see stable levitation.
Tip: Keep notes on what works and what doesn’t. Every diy magnetic levitation project is a little different, so experimenting helps you learn.
Magnetic Floating Display Ideas
Magnetic Levitating Display
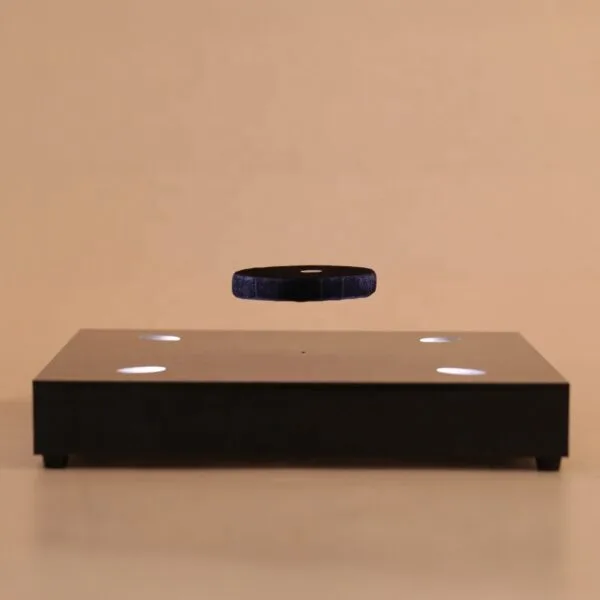
You can turn your project into a real showstopper with a magnetic levitating display. Many people love building a magnetic floating display to show off their favorite items. One popular idea is the levitating shoe display. This project combines a handcrafted look with a floating effect. The warm glow from the base makes the shoe look like it’s hovering in mid-air. It’s not just a display—it becomes a conversation starter in your room.
If you want to build your own magnetic floating display, here’s a simple guide:
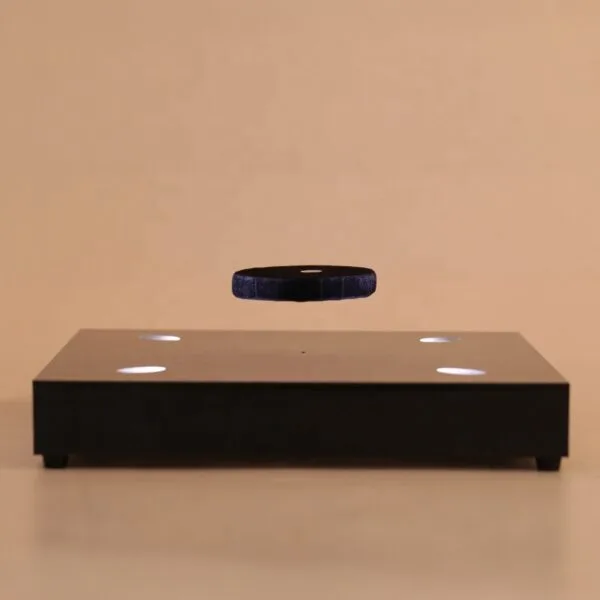
Gather your materials: You’ll need an electromagnetic base, a floating disc, a wooden box, a drill, and the object you want to display.
Drill a hole in the box for the power cable.
Place the electromagnetic base inside the box and run the power supply through the hole.
Find the right height for the floating disc above the base.
Set your decorative object on the floating platform.
Tip: Customizable magnetic floating displays let you swap out the object whenever you want a new look.
A magnetic levitating display works best when you pay attention to airflow, sensor systems, and a steady power supply. Check out this table for some key design tips:
Design Consideration | 描述 |
---|---|
Airflow | Use a small fan to keep things stable. |
Sensor Systems | Sensors help balance the floating disc. |
Power Supply | Make sure your power stays steady. |
Optical Sensor | Helps sync the floating platform with the base. |
Creative Projects
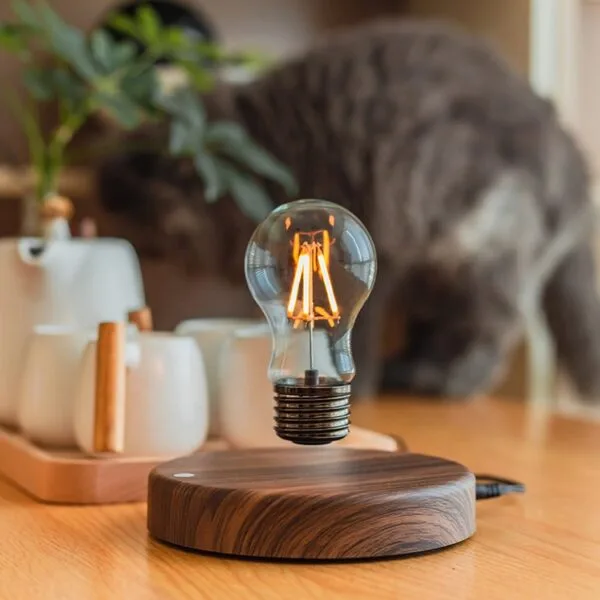
You can get creative with magnetic floating displays. Some people make floating magnetic lamps that light up while they hover. Others design levitating plants that spin slowly in the air. If you like tech, try a decorative snail lamp that uses magnetic levitation and wireless charging. You might even build a spinning top inspired by the movie ‘Inception’—it floats and spins at the same time!
Arduino opens up even more options for your magnetic floating display. You can use Arduino to control the coil and read the sensor. This lets you experiment with different codes and see how your floating object reacts. Feedback control systems help keep your magnetic floating displays stable, so your objects don’t fall. A Hall effect sensor and a feedback loop make it possible to adjust the magnetic field in real time.
Note: Beginner-friendly modules make it easy to start building magnetic floating displays, even if you’re new to electronics.
With a little imagination, you can turn any room into a science showcase using your own magnetic floating display.
Levitation Tips
Adjust Magnets
Getting your magnets in the right spot makes a huge difference. You can’t just use permanent magnets and expect perfect levitation. You need electromagnets and a feedback system to keep things steady. When you use advanced controllers, like a fractional order PID (FOPID) controller, you get more ways to fine-tune your setup. This controller lets you adjust five different settings, which helps you handle tricky changes in the system. With these controls, you can make your floating object settle much faster—sometimes almost twice as fast as with older methods.
Try moving your magnets closer or farther apart to see how it changes the floating effect.
Use your controller to tweak the power going to the electromagnet.
Watch how the object reacts and keep making small changes until it floats smoothly.
Tip: If your object wobbles or drops, check your magnet placement and adjust your controller settings.
Balance
You want your floating object to stay steady, not spin or tip over. Balancing takes patience, but you can do it with the right tricks.
This study outlines noncontact methods for orienting objects using magnetic levitation, where objects are suspended in a magnetic field gradient, showcasing another balancing technique.
The levitator utilizes four electromagnets that can quickly activate to stabilize a floating magnet. This rapid response allows for effective control of the magnet’s position, demonstrating a practical balancing technique using electromagnets.
Try these steps for better balance:
Place your object right in the center of the magnetic field.
Use more than one electromagnet if you want extra control.
Make sure your base is flat and your sensors are lined up.
Experiment
Don’t be afraid to try new things. Experimenting helps you find what works best for your setup.
Control System Design: Test both classic PID controllers and nonlinear controllers to see which gives you smoother levitation.
Optimization Algorithms: Try out different algorithms to boost your system’s performance.
Experimental Setups: Build and test different setups. Some work better for certain objects or weights.
Keep notes on what you change and what happens. Over time, you’ll figure out the best way to make your magnetic levitation project float like magic!
You’ve learned how magnetic levitation works, from building the base to testing your floating object. Try different project types—like floating trains or displays—and experiment with magnets, coils, and controllers. You might face challenges, but you’ll build problem-solving skills and discover new ways to learn science. Magnetic levitation makes learning hands-on and fun. Join online forums to share your results, ask questions, or help others. Ready to see what you can levitate next? 🚀
常问问题
What makes objects float in a magnetic levitation project?
You use strong magnets and special electronics to create a floating effect. The magnets push and pull on each other. The electronics help keep the object floating in the air. You can see the floating object move if you change the settings.
Can I float different objects, or does it only work with magnets?
You can float many things, but the best results come from objects with magnets inside. If you want to see something cool, try floating a small toy or a coin with a magnet attached. The floating effect works best when you balance the weight.
How do I keep my floating object from falling or spinning?
You need to adjust the magnets and use sensors to keep the floating object steady. If your floating object spins or drops, try moving the magnets or changing the controller settings. Sometimes, you need to add a little weight to help the floating object balance.
Is it possible to customize your display with magnetic levitation?
是的! You can customize your display by changing the floating object, the base, or even the lights. Try floating a favorite toy, a plant, or a photo. You can swap out the floating item whenever you want a new look.
Why does my floating project sometimes stop working?
If your floating project stops, check the power supply and the magnets. Sometimes, the floating object gets too heavy or the magnets move out of place. Make sure everything is tight and the floating object sits in the right spot.